Wizards for provisioning portal
I collaborated with a UX designer on a provisioning portal used to set up Azure hosting environments for desktop applications. The portal was initially created with no input from the UX team, and we were tasked with making the existing portal more user friendly as well as designing some new features. For the two wizards on this page, I handled both the content and the design.
Both wizards were new workflows. The first wizard is for channel partners, and the second one is for customers. (Jump to second wizard)
I've changes the company and product names in the images.
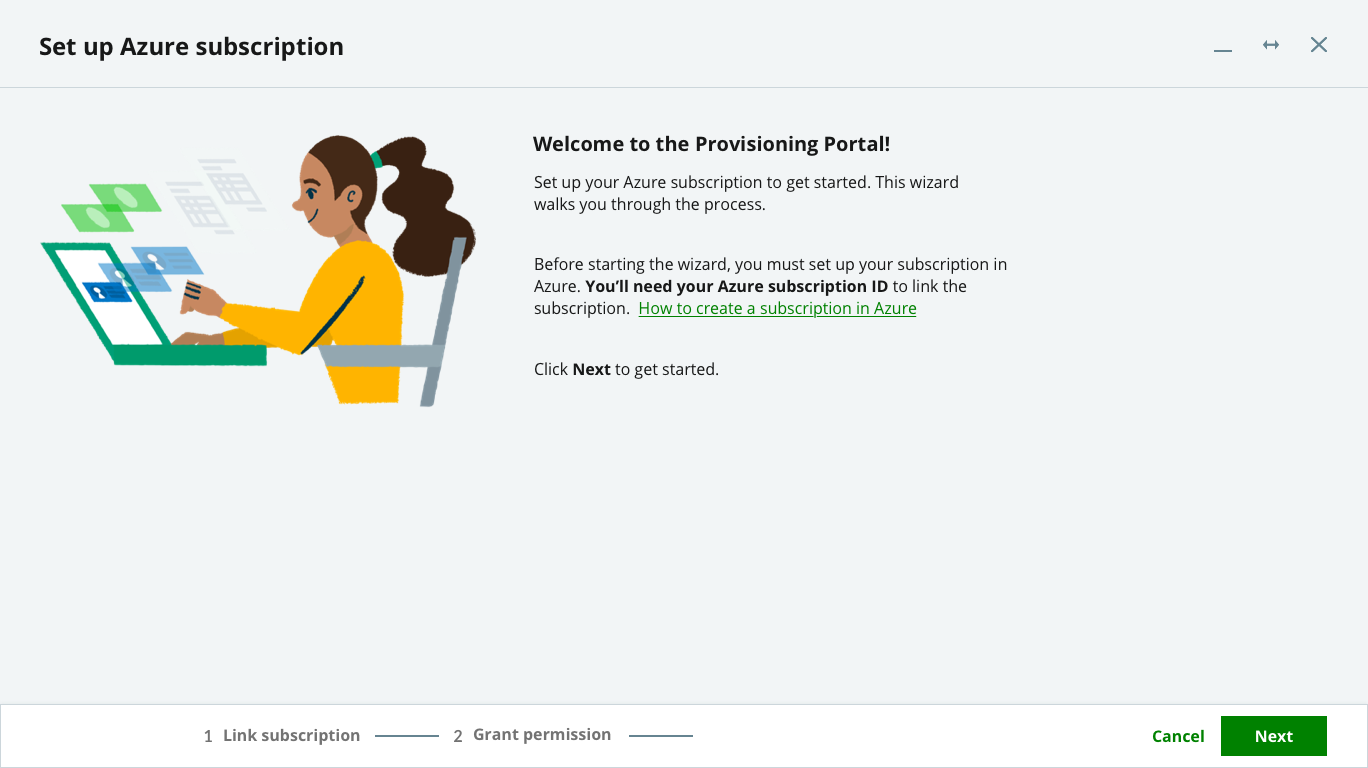
Subscription setup wizard
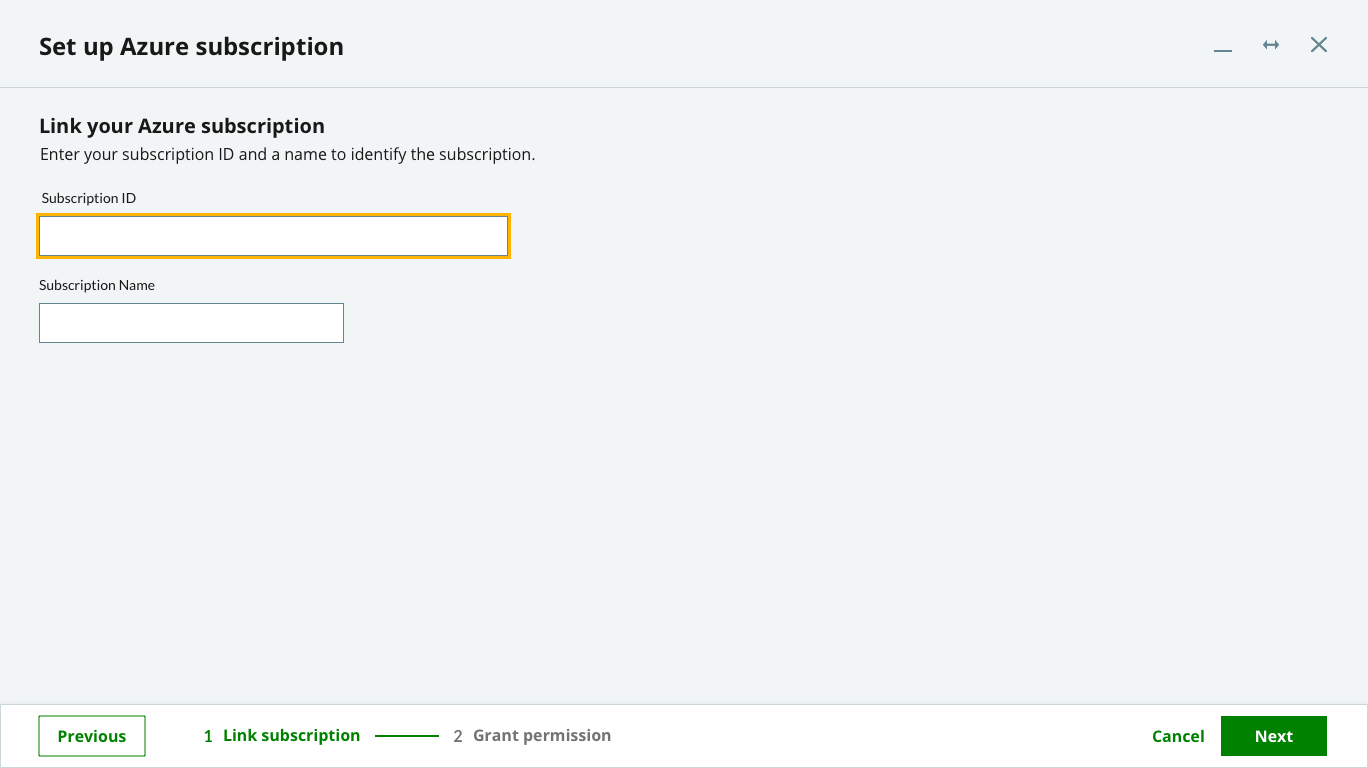
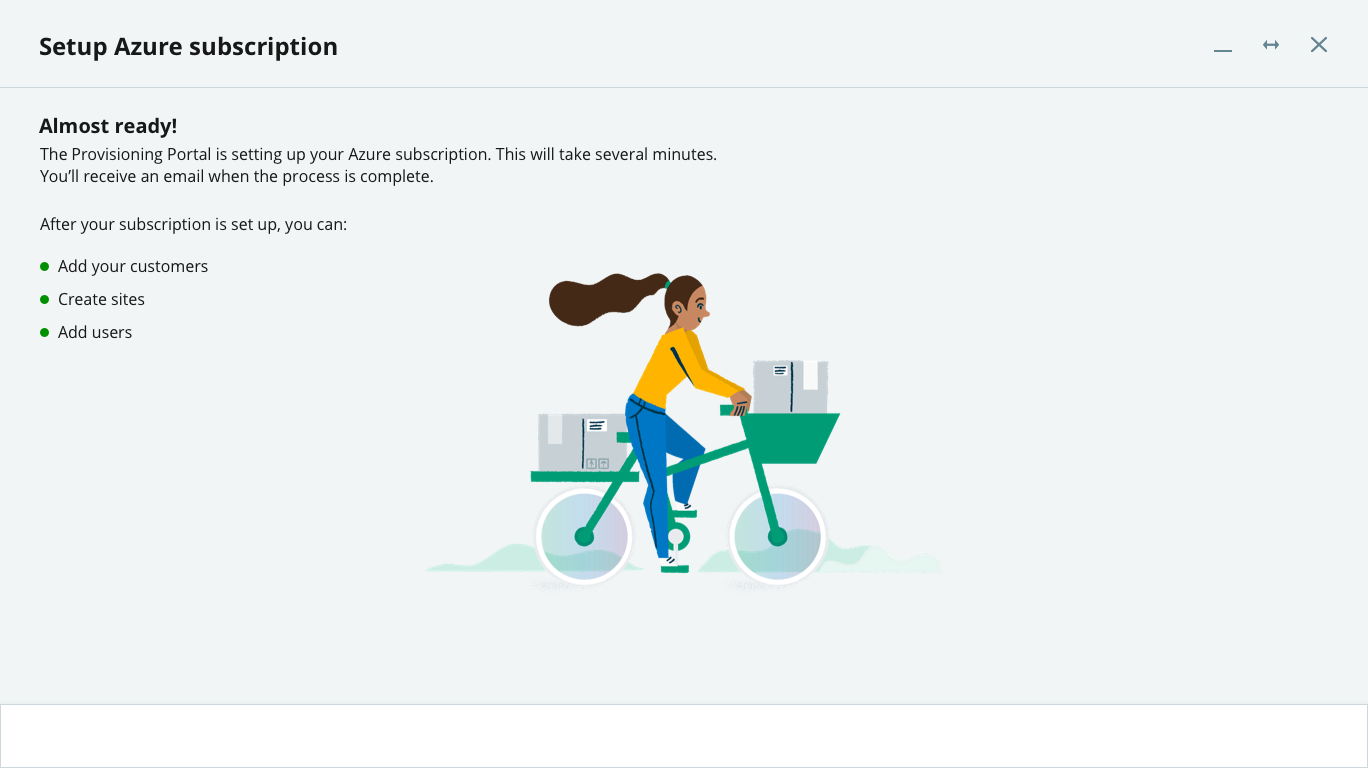
If the partner is new to the hosting program, the first step they must take is setting up their Azure subscription. The wizard starts after they click a link in an email and then sign in.
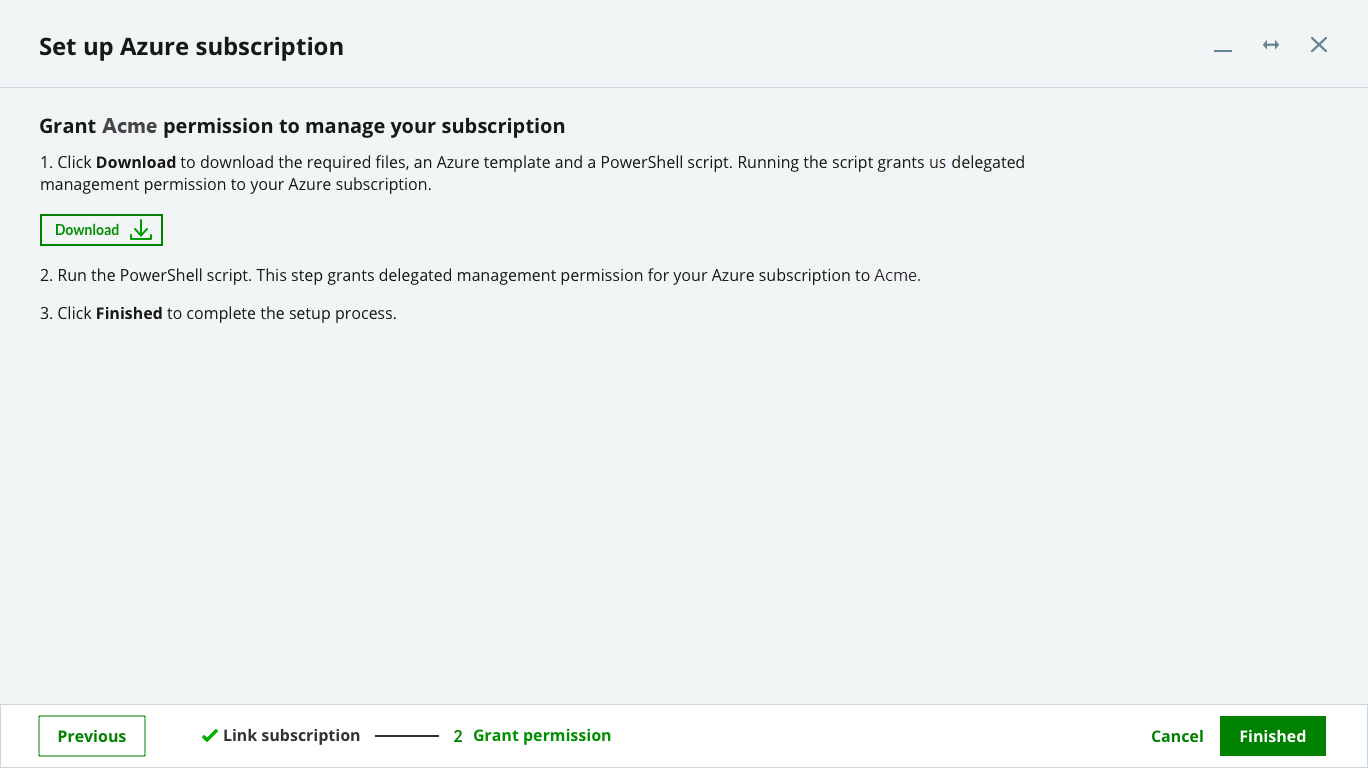
On the third screen where it instructs partners to run the PowerShell script, I initially planned to provide instructions on how to do that. However, the decision was made to leave that up to the partner's cloud solution provider (CSP).
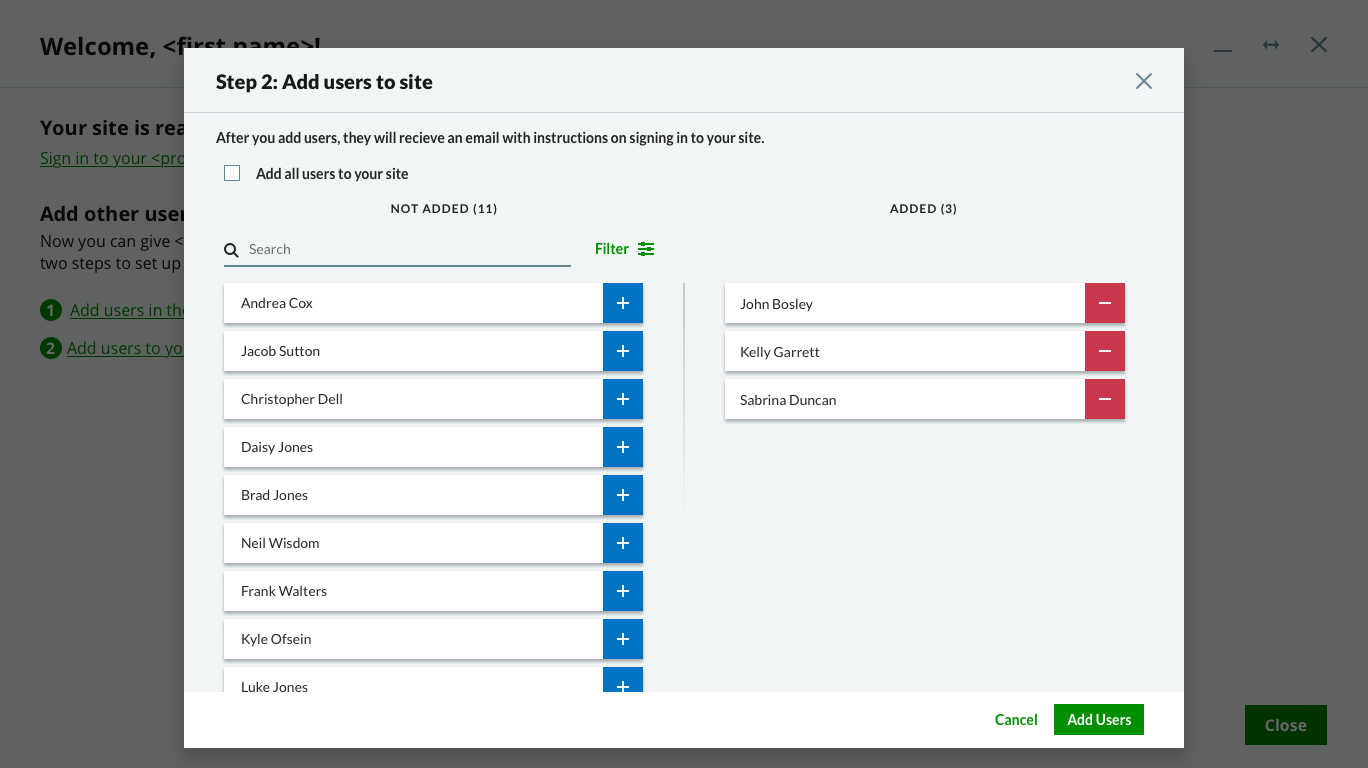
Add users wizard
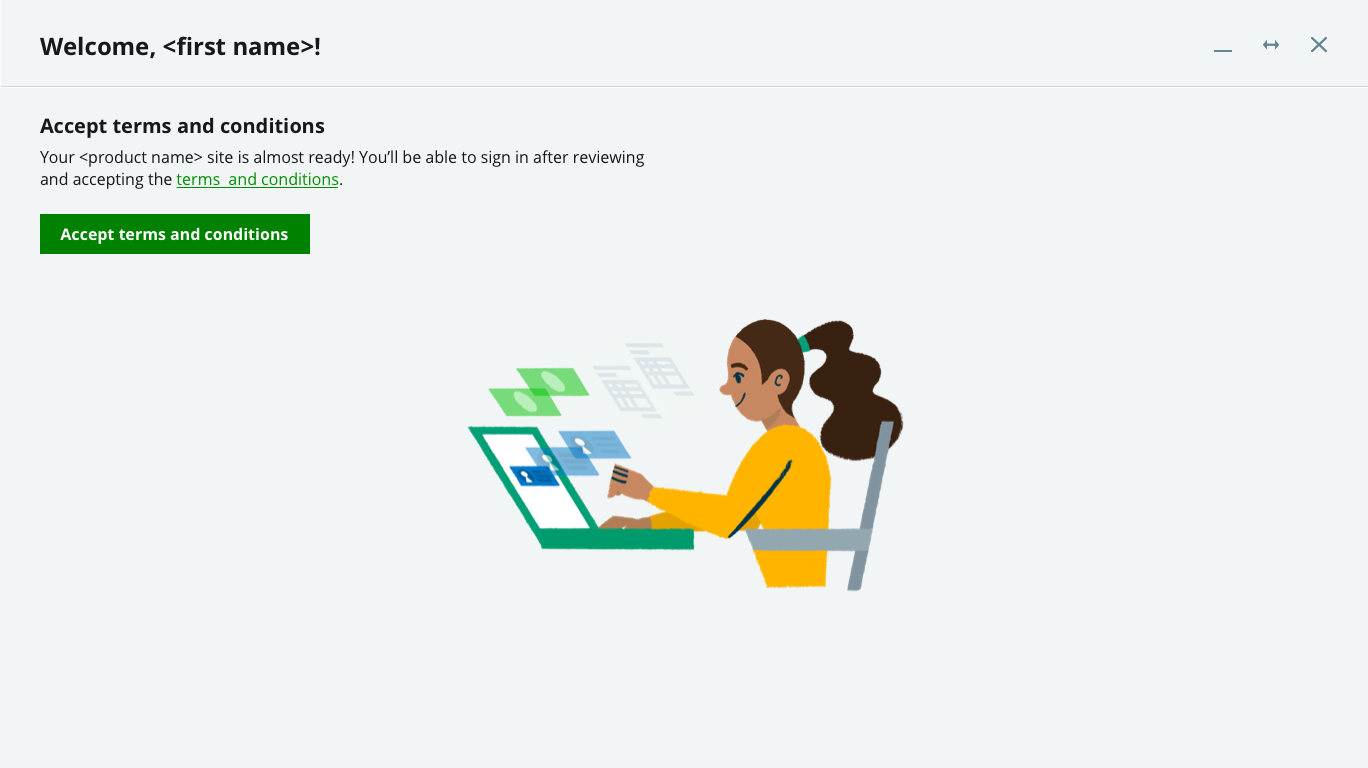
After a partner adds a customer to a site, the customer receives an email asking them to accept the terms and conditions. This is the wizard that starts when the customer clicks the link in the email. After accepting the terms and conditions, the customer is encouraged to add users to their site so that their colleagues can access the hosted application.

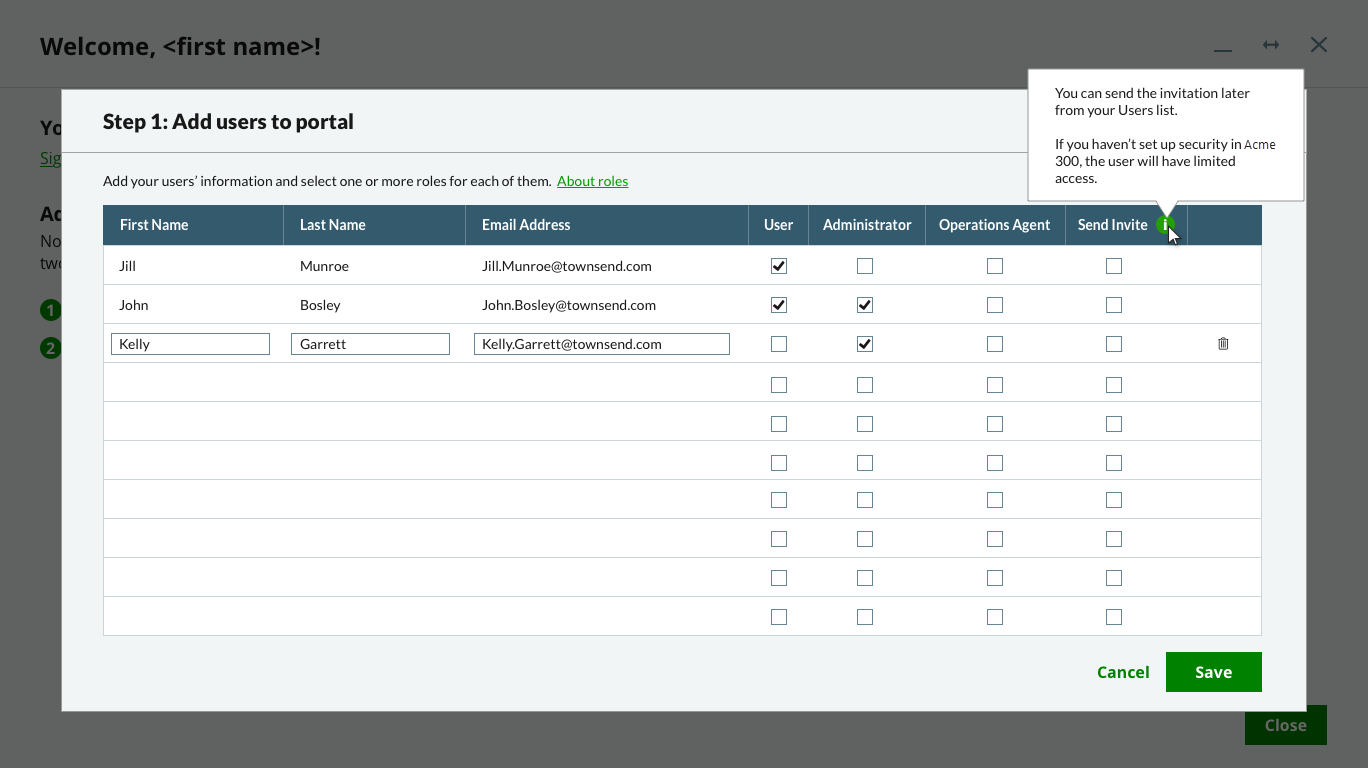
The customer sees the next screen if they click the "Add users in the portal" link.
After adding users to the portal, the customer can click the "Add users to your site" link to open the screen below.